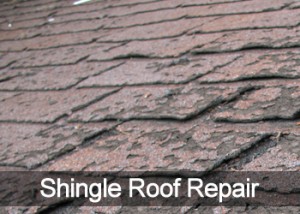
Shingle Roof Repairs
December 17th, 2014
Damaged shingles can have a significant impact on the lifespan of your roof, but they’re not particularly difficult or costly to replace. If you’re an experienced handyman with the proper tools and safety equipment, you can likely do the repairs yourself. Here is a quick outline of the steps involved, but take care! If you’re not confident in your abilities or you lack adequate equipment, hire a professional for your roof repair. It’s not expensive and your safety should be your primary concern.
Remove Damaged Shingles
First things first, you need to remove the damaged shingles, so follow these steps:
- Employ proper safety measures, not only do you want to wear protective gear including eyewear, gripping boots, and gloves, you should install roof jacks so you have something to stand on, and use a harness. Also, always work with a partner. No matter how simple or quick the repair job, ALWAYS use a harness and roof jacks.
- Assess the damage – are just the shingles damaged or are their signs of damage to the moisture barrier or flashing. If you can’t answer these questions, you’ll want to hire a professional roofer. Replacing shingles is fine, but if there is underlying damage, more extensive roofing repairs may be required.
- Use a pry bar, crow bar, or even a hammer claw to carefully pry shingles away from the roof and loosen the adhesive. You want to separate the adhesive and revealing nails of damaged shingles. You’ll also probably want to loosen the tabs of a few of the shingles around the damaged area to make sure you make a complete repair.
- Loosen exposed nails with a pry bar or hammer claw being careful not to break or damage remaining shingles. If you need to remove shingles surrounding the damaged shingles take care, you may be able to reuse them – providing they are not damaged in the process.
- Continue to loosen the adhesive under the damaged shingles and carefully remove the shingles. Don’t try to save severely damaged shingles.
Replacing Shingles
Now that you’ve removed the damaged shingles, they’re ready to be replaced.
- Place the new shingle in the same position as the damaged one that has been removed. If the new shingles have an adhesive strip, remove the covering then slide them into position. Finally, nail the new shingle to secure them. Look for pre-cut nail holes, as most new shingles will have them so you can easily nail the shingles into place. Otherwise, use other shingles on the roof as a guide for nail placement.
- Apply sealant under the edges of all shingles that have been replaced as well as surrounding shingles that have been loosened. Lift the shingle tabs and apply a 1-inch spot of shingle cement under each tab on the shingle. Press the tabs down to ensure they are property secured.


